This article will guide you through the process of obtaining the Integration Token needed for utilizing the Notion API, which is useful for automating and integrating with Notion. We will also provide a walkthrough for the initial setup process required for the Notion API. Additionally, we plan to update this article with Q&A related to Notion API setup and usage.
Please note that the steps introduced in this article are for setting up and acquiring tokens for the automation tools provided by “GAS LAB”, which specializes in planning and developing AI and automation tools. If you plan to use this for other purposes, the setup process might vary slightly.
[Prerequisite] Requirements for Notion API Setup & Usage
Before you can set up and use the Notion API, you need to meet the following requirements:
- You have created a Notion account and have your own workspace.
- You hold owner (administrator) permissions in the workspace.
Please be aware that if you do not have owner permissions, you will not be able to proceed with the API setup process explained in this article.
Overall Process for Notion API Usage
There are three steps you must follow to use the Notion API:
- Create a new “Integration” associated with the workspace.
- Obtain the Integration Token for the Notion API.
- Authorize the integration to use the page or database etc., where you want to use the API.
While these might sound complicated, they can be achieved primarily through input and click operations, so no advanced knowledge is required.
The following sections will guide you through these steps with accompanying images. If you follow these steps, you should be able to set up and acquire the tokens without any problems.
Procedure for Obtaining Integration Token for Notion API Usage
In this section, we will explain, step by step, how to create a new integration and how to obtain the token necessary for using the Notion API.
STEP1: Access “My integrations”
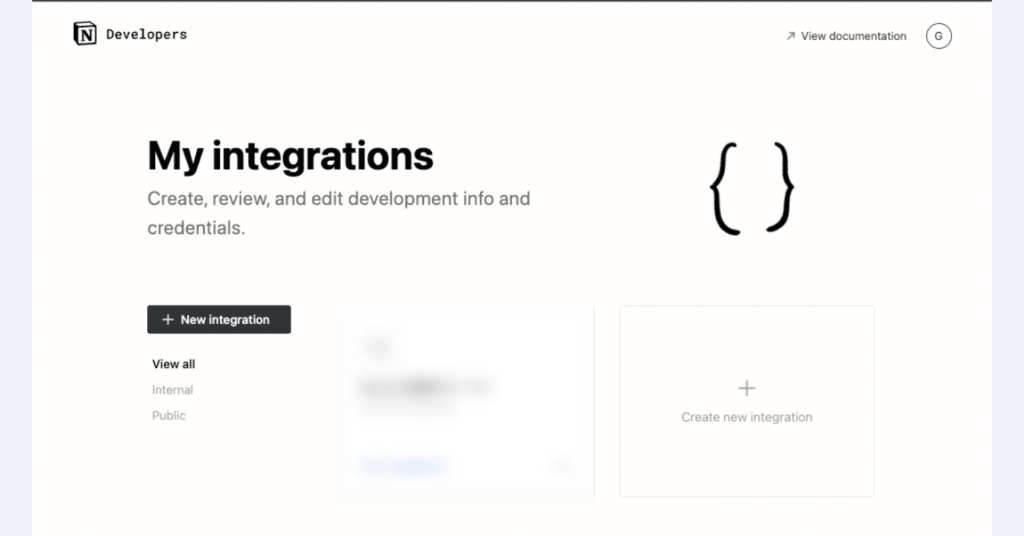
Access the “My integrations” page in the workspace where you are an administrator (owner).
- URL for the “My integrations” page:
STEP2: Click “+New Integration”
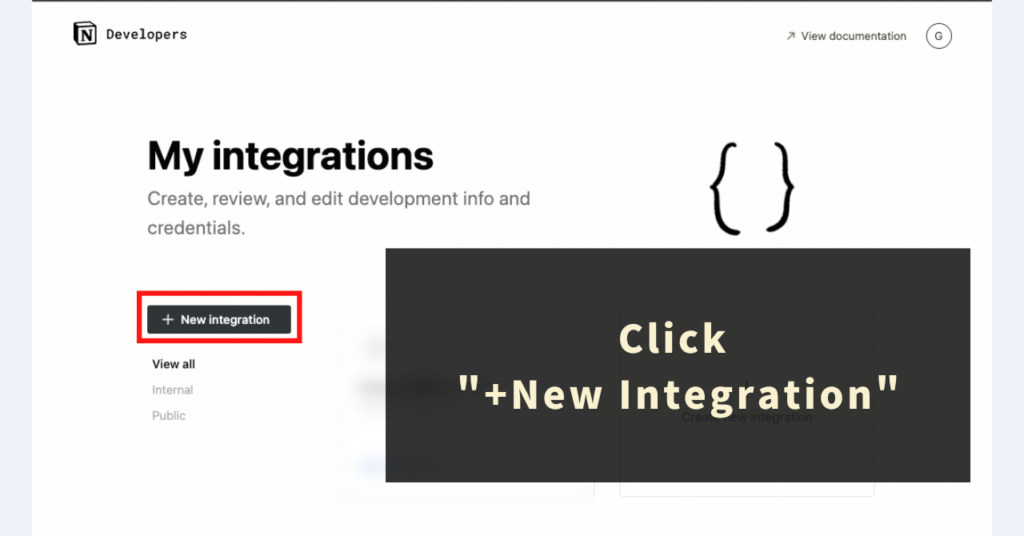
Click on the “+New Integration” button.
STEP3: Fill in and submit the “Basic Information”
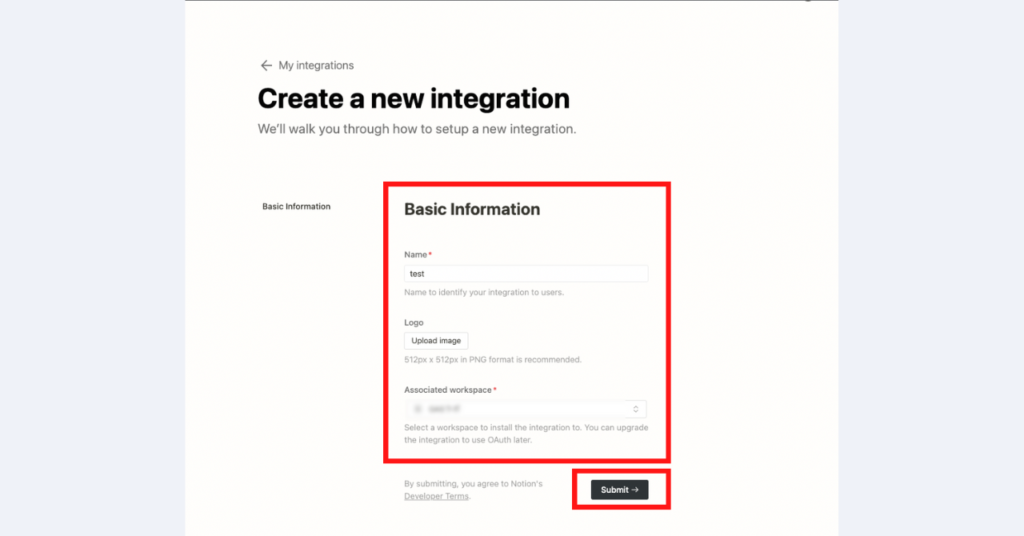
A screen will appear for you to input the basic information. Please fill in the following items:
- Name
- This is the name to identify this integration.
- Example: “Notion Automation Tool”
- This is the name to identify this integration.
- Associated workspace
- Specify the workspace you want to use the API in from the dropdown menu.
Once you have completed the input, click the “Submit→” button at the bottom right of the screen.
STEP4: Reveal and Copy Token from “Secret”
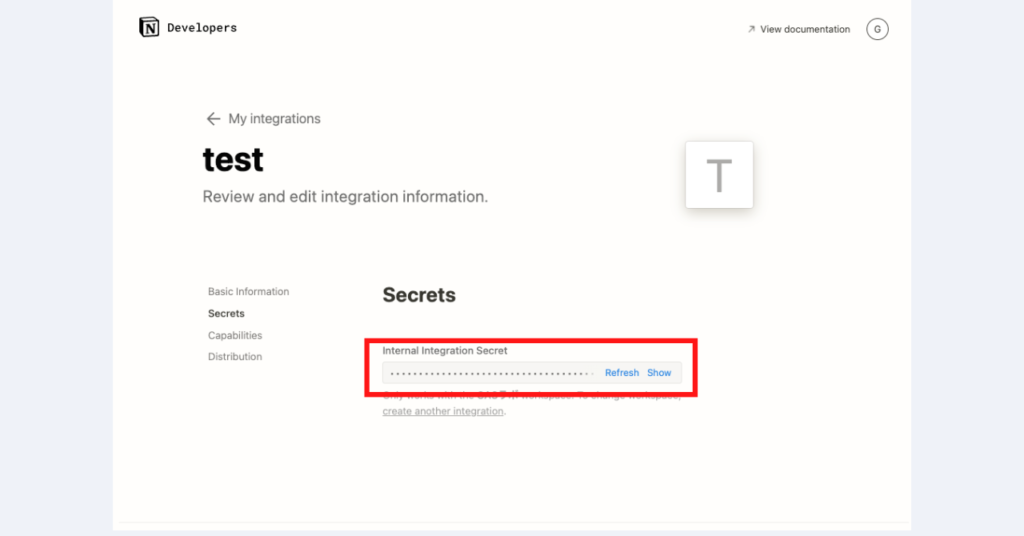
You will then be directed to a page where the token is displayed in a hidden format in the “Secret” section. Reveal the token, then copy and save it for future use.
If you’re using GAS LAB’s automation tool, there is a field prepared in the “Settings” sheet where you can paste the acquired Notion API token. Please paste the token you obtained directly into this field.
Setting Up Permission for Notion Integration (API)
While the steps above will help you obtain the necessary token, you may not be able to fetch or manipulate data just yet.
If you wish to fetch or manipulate data from specific pages or databases, please follow the permission settings process outlined below for each page or database.
STEP 1: Open the page or database for which you want to allow API operations and click the ‘…’ menu
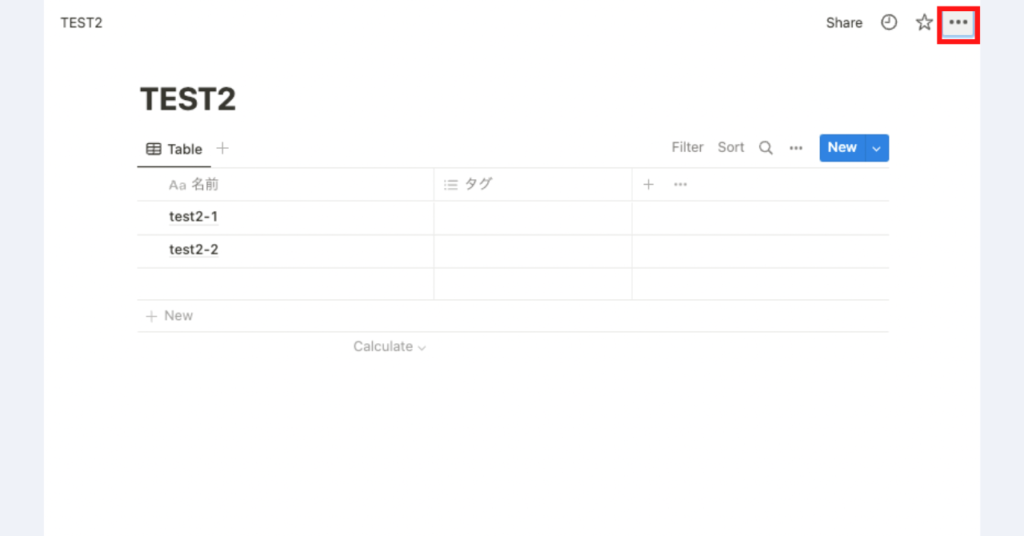
Open the page or database you want the integration (API) to operate on, then click the ‘…’ menu located at the top right of the screen.
STEP 2: From the menu, click on ‘+Add connection’ > ‘The name of the integration you created’
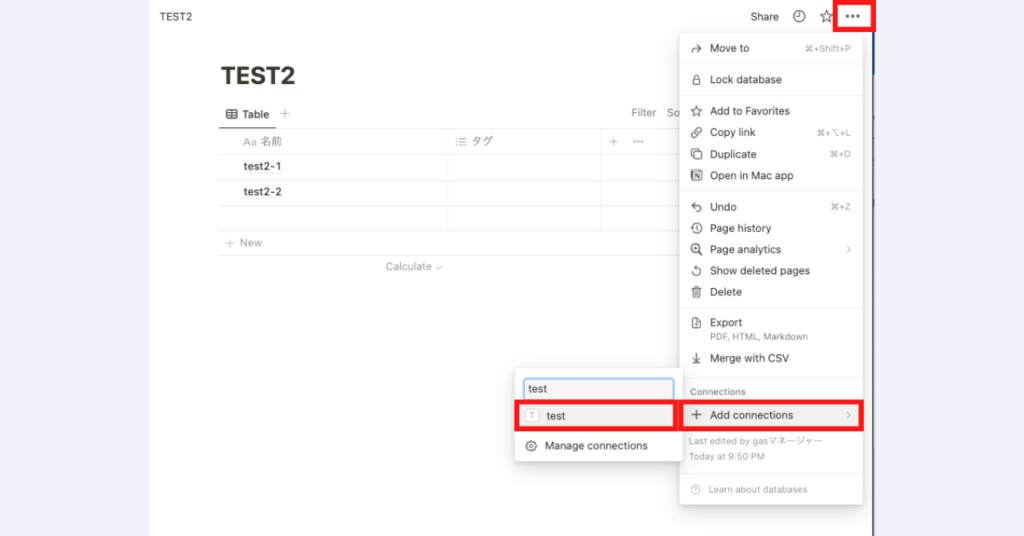
Next, a list of menu options will be displayed. Hover your cursor over ‘+Add connections’, then look for and click on ‘The name of the integration you created’.
STEP 3: In the pop-up, select ‘Confirm’

A pop-up will appear next, please click on ‘Confirm’.
With this, the Notion API (Integration) will now have access to the relevant pages and databases, and operations can be performed.
Q&A
Q: I can’t select the correct workspace in ‘Associated Workspace’. What should I do?
If you cannot see the correct workspace you intended to select under ‘Associated Workspace’ during the process of creating a new integration, you may not be properly logged in on your web browser. Please make sure you’re logged in with the account you intended to use.
Q: How can I change the ‘Associated Workspace’?
Once an integration has been created, you cannot change its ‘Associated Workspace’. If you need to associate the integration with a different workspace, you will have to create a new integration and select a different ‘Associated Workspace’.